Making your own leather belt can be very easy to do and a fun craft that the whole family can enjoy. Whether it be a leather belt for Mom and Dad or kids western belts that the children can wear around the house or to fancy steakhouses, a properly made belt is a thing to behold and treasure.
1. It is best to start the belt with what is known as a belt blank. A blank already has the buckle mounted on the strap. While a plain strap can certainly be used, many people find it far more convenient to already have the buckle mounted when they begin their project.
2. The blank should be prepared by dipping the entire thing in water for a minute or two and then wrapping it in paper towels which are damp. Set it aside overnight so that it procures the perfect pliability for working and tooling it.
3. The next step is to determine what size of belt you will need. The easiest way is to use a belt you already have as a guide but there is also a rule of thumb that one can go by. This would be the waist size of your pants in inches plus two inches. Then add six inches for the holes and extra space at the end.
4. After the measurements have been determined, cut the leather strap off at the end using a sharp pair of leather or textile scissors. The end can be cut into a variety of shapes including a rounded end, a pointed end, and other similar shapes.
5. Using an extremely sharp knife such as an X-Acto knife, mark on the belt where the holes will be placed. Next, use a punch tool to physically make the holes in the belt.
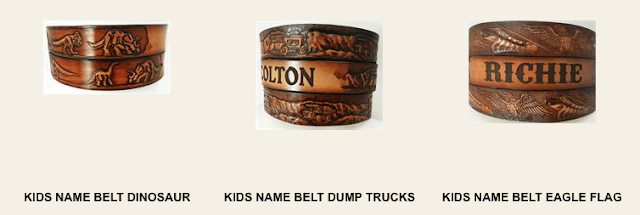
6. The next step is by far the most fun! This is where you can personalize it by engraving a name on it or tooling in other designs. You can also dye the leather any color of your choosing.

1. It is best to start the belt with what is known as a belt blank. A blank already has the buckle mounted on the strap. While a plain strap can certainly be used, many people find it far more convenient to already have the buckle mounted when they begin their project.
2. The blank should be prepared by dipping the entire thing in water for a minute or two and then wrapping it in paper towels which are damp. Set it aside overnight so that it procures the perfect pliability for working and tooling it.
3. The next step is to determine what size of belt you will need. The easiest way is to use a belt you already have as a guide but there is also a rule of thumb that one can go by. This would be the waist size of your pants in inches plus two inches. Then add six inches for the holes and extra space at the end.
4. After the measurements have been determined, cut the leather strap off at the end using a sharp pair of leather or textile scissors. The end can be cut into a variety of shapes including a rounded end, a pointed end, and other similar shapes.
5. Using an extremely sharp knife such as an X-Acto knife, mark on the belt where the holes will be placed. Next, use a punch tool to physically make the holes in the belt.
6. The next step is by far the most fun! This is where you can personalize it by engraving a name on it or tooling in other designs. You can also dye the leather any color of your choosing.
Comments